 |  |  |  |  |
 |  |  |  |  |
|
|
 |
 |  |  |  |  |
|
|
 |
 |  |  |  |  |
| Using the Content Manager |
|
 |
 |  |  |  |  |
|
|
 |
 |  |  |  |  |
|
|
 |
 |  |  |  |  |
|
|
 |
 |  |  |  |  |
|
|
 |
 |  |  |  |  |
|
|
 |
 |  |  |  |  |
|
|
 |
 |  |  |  |  |
|
|
 |
 |  |  |  |  |
|
|
 |
 |  |  |  |  |
|
|
 |
 |  |  |  |  |
|
|
 |
 |  |  |  |  |
|
|
 |
 |  |  |  |  |
|
|
 |
 |  |  |  |  |
|
|
 |
 |  |  |  |  |
|
|
 |
 |  |  |  |  |
|
|
 |
 |  |  |  |  |
|
|
 |
 |  |  |
|
The Content Manager is the primary human interface for HyperContent; it is the entry point for administrators, content authors and developers alike. Content Manager is a uPortal channel; it must be installed, published and subscribed to by a user before it will be visible. Please see the "Getting Started" section for more information about this process.
HyperContent organizes information according to project ; each project represents a unique configuration of content types, structure, underlying filesystems, and authoring environments. Each project might represent a particular web site, or a repository of data of interest to a particular population. There is a special project called "CMS Project Definitions" which is used to store the XML configuration files for every other project in the system; via this bootstrap project new projects can be added, or existing projects altered or extended.
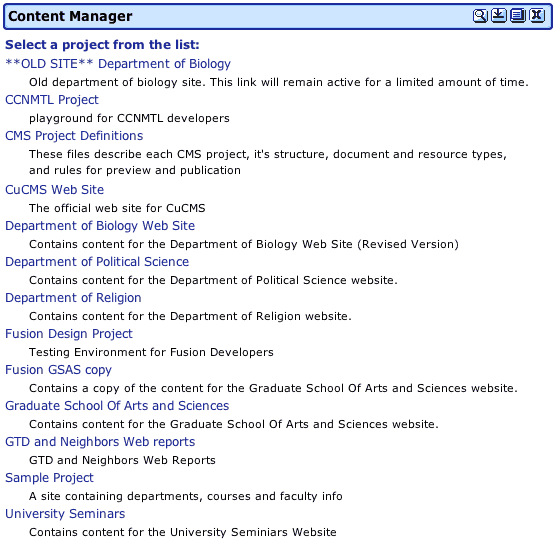
When the Content Manager first appears on screen, it will show you a list of projects to which you have access. If you are an authenticated portal administrator, you will see a list of all projects in the system.

Click on the title of any project to open it. Once it is open, you will be taken to the project's browse screen. This is divided into three main areas: across the top, beneath the project title, is the top navigation; on the left is the directory tree showing the repository filesystem; on the right is the details screen which allows you to perform any of the available administrative functions, or enter authoring mode. Subsequent chapters describe these different sections of the interface.

|
|  |


